OptinMonster Review 2026: Email Opt-in Software for Rapid List Growth
Every business wants growth, and email marketing remains one of the most effective ways to achieve it. But without a reliable email opt-in solution, you could be losing valuable leads and potential sales.
In this OptinMonster review, we’ll explore why this tool is considered one of the best for growing your email list, its features, pricing, and how to create high-converting campaigns step by step.
Why Your Business Needs an Email Opt-in Solution
Email marketing allows businesses to connect directly with customers and followers. But even with a well-designed website and steady traffic, simply adding a sign-up form doesn’t guarantee conversions.
To truly grow your email list, you need a powerful, easy-to-use tool that can:
- Capture visitors’ emails effectively
- Target the right audience at the right time
- Boost conversions without complex coding
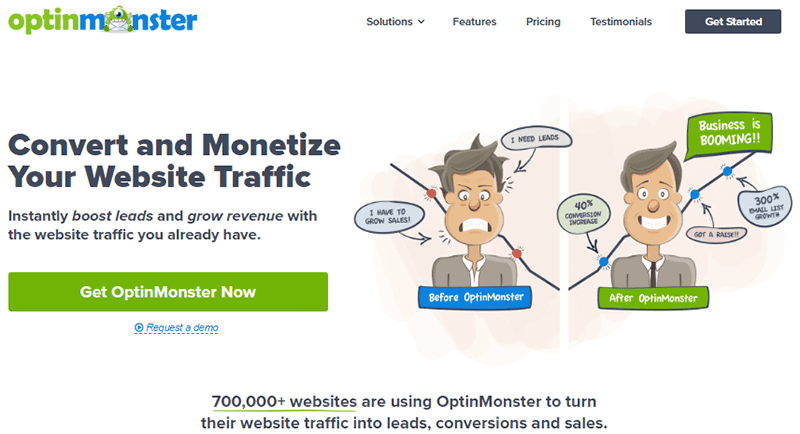
This is where OptinMonster comes in — a leading email opt-in solution designed to maximize leads and conversions effortlessly.
What is OptinMonster?
OptinMonster is a cloud-based lead generation software trusted by marketers and businesses worldwide. Founded by Syed Balkhi, the creator of WPBeginner, it has been revolutionizing lead generation since 2013.
Key highlights:
- Works with almost all websites, including WordPress
- Drag-and-drop opt-in form builder — no coding required
- Attractive pre-designed templates to kickstart campaigns
- Advanced features like Exit-Intent technology and Display Rules Engine
OptinMonster is designed to convert abandoning visitors into subscribers and paying customers while saving time and effort.
OptinMonster Features: In-Depth Breakdown (Why It Stands Out)
OptinMonster is widely regarded as one of the best email opt-in and lead generation tools on the market. Below is a detailed breakdown of its most powerful features and how they help you grow your email list and boost conversions.
1. Easy-to-Use, Streamlined Interface
OptinMonster’s interface is designed for simplicity and speed, so you can create campaigns without frustration.
- Visual drag-and-drop builder — create opt-in forms without coding
- Live preview editor — see real-time changes as you design
- Mobile-responsive controls — customize forms for desktop, tablet, and mobile
- Typography and styling options — adjust fonts, line height, spacing, and colors
- Centralized dashboard — manage all campaigns, analytics, and settings from one place
Why it matters: A clean and intuitive interface allows you to launch campaigns faster, reduce errors, and focus on conversions instead of technical setup.
2. Exit-Intent Technology (Conversion Booster)
Exit-Intent® is OptinMonster’s most talked-about feature and a key reason people search for OptinMonster reviews.
- Detects cursor movement when users are about to leave your website
- Triggers targeted opt-ins at the perfect moment
- Works on desktop and mobile devices
- Ideal for discounts, lead magnets, and last-chance offers
- Can increase conversions by up to 200%+
Why this matters: Most visitors leave without taking action. Exit-Intent gives you one final opportunity to capture their email before they disappear forever.
3. Multiple Opt-in Types & Display Locations
OptinMonster supports five main opt-in types, each suited for different use cases.
- Pop-Up:
- Appears in the center of the screen
- Triggered by time on page, scroll depth, or exit intent
- Highly visible and effective for lead capture
- Fullscreen Overlay:
- Covers the entire screen
- Best for high-priority messages, product launches, or special offers
- Slide-In Forms:
- Slides from the bottom corner as visitors scroll
- Less intrusive than pop-ups, keeps users engaged
- Floating Bar:
- Fixed bar at the top or bottom of the page
- Constantly visible, ideal for calls-to-action without disrupting content
- Inline Forms:
- Embedded inside blog posts or content
- Targets engaged readers who are already consuming your content
Why it matters: Having multiple opt-in types allows you to reach different audiences at the right time without annoying them.
4. Professionally Designed Opt-in Templates
OptinMonster includes dozens of high-converting, pre-designed templates.
- 15–25 templates per opt-in type
- Designed using conversion best practices
- Fully customizable layouts
- Mobile-optimized out of the box
- Blank template option for advanced users
Why this matters: You can launch beautiful opt-in campaigns in minutes without starting from scratch — perfect for beginners and busy marketers.
5. Advanced Campaign Targeting & Display Rules Engine
The Display Rules Engine is one of OptinMonster’s most powerful features.
- Behavior targeting — scroll depth, time on page, exit intent
- Location targeting — country, state, city-based rules
- Device targeting — desktop vs mobile campaigns
- Referral targeting — show opt-ins based on traffic source
- Page-level targeting — show campaigns only on specific posts or URLs
- Rule stacking — combine multiple rules for precision targeting
Why this matters: Targeted opt-ins convert significantly better than generic popups. OptinMonster ensures the right message reaches the right visitor at the right time.
6. Built-In A/B Split Testing
OptinMonster includes native A/B testing (split testing) so you can optimize campaigns continuously.
- Test multiple opt-in variations
- Compare headlines, layouts, colors, and triggers
- Automatic performance tracking
- Identify highest-converting versions
- Improve ROI without guesswork
Why this matters: Data-driven optimization helps you increase conversions without increasing traffic.
7. Seamless Email Marketing Integrations
OptinMonster integrates with nearly all major email marketing platforms.
Supported integrations include:
- Mailchimp
- ActiveCampaign
- Constant Contact
- Sendinblue
- Campaign Monitor
- MailerLite
- Custom HTML forms
Why this matters: New subscribers are automatically added to your email list, keeping your marketing funnel fully automated.
8. Google Analytics & Conversion Tracking
OptinMonster provides advanced analytics to track performance.
- Google Analytics integration
- Real-time engagement data
- Conversion rate tracking
- Traffic source analysis
- New vs returning visitor insights
Why this matters: Understanding what works allows you to optimize underperforming campaigns and scale winning ones.
9. Multi-Site Campaign Management
Because OptinMonster is a cloud-based SaaS platform, it’s ideal for agencies and multi-site owners.
- Manage campaigns across multiple websites
- Duplicate campaigns with one click
- Consistent branding across sites
- Centralized analytics dashboard
Why this matters: You save time and effort by managing everything from one centralized interface.
10. Premium Support & Continuous Updates
Every OptinMonster plan includes professional support.
- 1-year premium support included
- Priority support for Growth plan users
- Regular feature updates & improvements
- Security and performance optimizations
Why this matters: Reliable support ensures your lead generation system runs smoothly without interruptions.
How to Create an Email Opt-in Campaign with OptinMonster
Creating an email opt-in campaign with OptinMonster is straightforward, even for beginners. In this step-by-step guide, you’ll learn how to create, customize, target, and publish a high-converting opt-in campaign.
Step 1: Create a New Campaign
In marketing, a campaign is a series of actions designed to achieve a specific goal. With OptinMonster, campaigns are primarily used to increase email signups and grow your mailing list.
You can run multiple campaigns on your website at the same time, such as:
- Offering a free guide or checklist in exchange for an email address
- Providing a discount or coupon for new subscribers
- Promoting newsletter signups or special announcements
To create a new campaign,
- Log in to your OptinMonster Dashboard
- Click the Create Campaign button

On the Campaigns page, you’ll choose two things:
1. Campaign Type
OptinMonster currently supports five opt-in types:
- Popup
- Fullscreen
- Slide-in
- Floating bar
- Inline opt-in
Choose the type that suits your campaign’s needs.
2. Campaign Template
Each campaign type includes several pre-made templates, which are ideal for getting started quickly. Once you select the campaign type, you’ll see all available templates for that format.
You can hover over any template and click Preview to see how it looks before selecting it.
After choosing a template:
- Click Use Template
- Enter a campaign name
- Select the website where the campaign will run
- Click Start Building
Step 2: Customize Opt-in Form Design
Once inside the editor, you can customize every element of your opt-in form.
Customization Options Include:
- Click any block to edit text directly
- Change fonts, line height, and letter spacing
- Modify button styles, colors, and backgrounds
- Add, remove, or reorder form fields
From the Optin Settings panel on the left, you can:
- Adjust padding and borders
- Change background styles
- Add custom CSS if needed
Set Success Actions
After a successful signup, you can choose what happens next:
- Show a success message
- Redirect to a URL
- Reload the page
- Close the campaign
To configure this, click the Success tab above the preview panel and customize the success view.
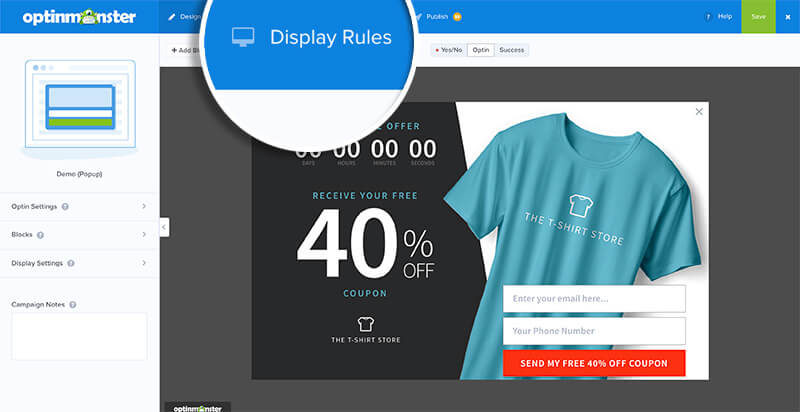
Step 3: Configure Targeting & Display Rules
Displaying your opt-in at the right time is crucial. Poor timing or excessive popups can frustrate users and reduce conversions.
OptinMonster’s Display Rules Engine lets you control:
- When your campaign appears
- Where it appears on your site
- Who sees it
Examples of Display Rules:
- Show after a user scrolls 50% of the page
- Trigger on exit intent
- Display only on specific pages or posts
- Target new or returning visitors
To configure this:
- Click the Display Rules tab from the top menu
- Add and combine rules based on your campaign goals
Step 4: Integrate with Email Marketing
OptinMonster integrates seamlessly with most major email marketing platforms, including:
- Mailchimp
- ActiveCampaign
- Campaign Monitor
- Constant Contact
- MailerLite
- Sendinblue
- MailPoet
- Custom HTML forms
Integration Steps:
- Go to the Integrations tab
- Click Add New Integration
- Select your email marketing provider
- Connect your account
Once connected, new subscribers will be added automatically to your email list.
Step 5: Connect to Google Analytics
OptinMonster integrates with Google Analytics, allowing you to monitor campaign performance in detail.
Metrics You Can Track:
- Real-time visitor engagement
- Conversion rates
- New vs returning visitors
- Geographic and demographic data
- Device and platform usage
- Referral sources (Facebook, Twitter, Instagram, etc.)
How to Connect:
- Go to the Analytics tab
- Click Connect next to Google Analytics
- Authenticate your Google Analytics account
Once connected, analytics tracking will be enabled for your campaigns.
Step 6: Publish Your Campaign
After completing setup and customization, it’s time to go live.
Publishing Steps:
- Click the Publish tab in the campaign menu
- Toggle Publish Status from Paused to Live
- Click Save to apply changes
Your email opt-in campaign is now live and ready to start converting visitors into subscribers.
Managing Your Campaigns in OptinMonster
OptinMonster is an all-in-one lead generation platform that allows you to plan, manage, and optimize your entire opt-in marketing strategy from a single, intuitive dashboard.
With centralized campaign management and real-time insights, you can easily track performance, understand visitor behavior, and identify which opt-in strategies are delivering the best results.
Centralized Campaign Dashboard
The OptinMonster dashboard displays all your campaigns in one place, even if they’re running across multiple websites.
Key Dashboard Features:
- View campaigns grouped by website under one account
- Monitor real-time performance metrics for each campaign
- Quickly identify active, paused, or completed campaigns
To view detailed analytics for a specific campaign:
- Locate the campaign in the dashboard
- Click the Analytics icon under the Actions column
- Review performance data for the last 30 days (or adjust the date range as needed)
This gives you immediate visibility into how each campaign is performing over time.
Campaign Duplication & A/B Split Testing
OptinMonster makes optimization effortless.
Optimization Tools Available:
- Duplicate campaigns with one click to reuse successful designs
- Create A/B split tests to compare different headlines, designs, or offers
- Identify winning variations that generate higher conversions
Split testing helps you make informed improvements and continuously increase your email opt-in rates.
Analytics and Reporting
OptinMonster’s built-in conversion analytics provide clear, actionable insights into campaign performance.
Metrics You Can Track:
- Impressions and views
- Clicks and engagements
- Overall conversion rate
The platform integrates seamlessly with Google Analytics, allowing you to view campaign performance alongside your broader website data.
Referral Tracking & Performance Insights
OptinMonster’s referral tracking system helps you identify:
- Which pages or posts generate the most conversions
- Where your highest-quality leads are coming from
By understanding what’s working best, you can focus on high-performing pages and refine underperforming campaigns.
Make Data-Driven Marketing Decisions
With access to real performance data, OptinMonster enables you to:
- Optimize campaigns based on actual user behavior
- Eliminate ineffective opt-in methods
- Scale strategies that consistently grow your email list
Using these insights, you can make smarter, data-driven decisions and steadily increase conversions.
OptinMonster Pricing
OptinMonster offers four flexible plans:
| Plan | Price/Month | Sites | Key Features |
| Basic | $18 | 1 | Essential features, 1-year support |
| Plus | $48 | 2 | Advanced targeting, analytics |
| Pro | $73 | 3 | Full integrations, A/B testing |
| Growth | $123 | 5 | All features for agencies, priority support |
All plans include:
- One full year of premium support
- 14-day money-back guarantee
- Option to save 60% on annual purchases
Tip: The Pro or Growth plan is ideal for businesses managing multiple websites or advanced campaigns.
Final Verdict: Is OptinMonster Worth It?
OptinMonster is one of the most powerful email opt-in tools available today.
Pros:
- Easy-to-use drag-and-drop editor
- Multiple opt-in types and templates
- Advanced targeting with Display Rules Engine
- Seamless integration with email services and Google Analytics
- A/B testing and multi-site management
Cons:
- Slightly higher starting price at $18/month or $7/month when billed annually
- Some advanced features require Pro or Growth plan
Overall: If you want to grow your email list, improve conversions, and save time, OptinMonster is worth every penny. It’s a complete lead generation solution for bloggers, businesses, and marketers.
Frequently Asked Questions (FAQ)
Q1: Does OptinMonster work with WordPress?
Yes. OptinMonster integrates seamlessly with WordPress using its official plugin or by adding custom embed code. You can create and manage campaigns directly from your WordPress dashboard.
Q2: Can I track conversions with Google Analytics?
Absolutely. OptinMonster integrates with Google Analytics, allowing you to track impressions, conversions, engagement, demographics, and traffic sources in real time.
Q3: Is OptinMonster suitable for small businesses?
Yes. OptinMonster is ideal for small businesses and startups. The Basic plan is affordable and provides all the essential features needed to grow an email list and improve conversions.
Q4: Does OptinMonster offer a trial or money-back guarantee?
Yes. OptinMonster offers a 14-day money-back guarantee and provides up to 50% off on annual plans, allowing you to try the platform risk-free.
Start Growing Your Email List Today
With OptinMonster, you don’t need to be tech-savvy to run successful email campaigns. From exit-intent pop-ups to A/B testing and advanced targeting, it’s a complete email opt-in solution.
Get up to 7 MONTHS FREE (that’s 60% off!) when you purchase OptinMonster today!
Try OptinMonster Now and watch your email list grow.
Disclaimer: This post may include affiliate links. If you click one of them, we may receive a small commission at no extra cost to you. Thank you for your support.